No products in the cart.

Ok, so you want to make a guitar cabinet however before you start I thought I would share the top 10 things you need to do to ensure you don't find issues down the track. Trust me, I have I have learnt from my own mistakes.
1. Pick an easy build.
Don't start with the idea of a fancy timber build with dovetail joints etc. You just not likely to end up with a great end result unless you're a carpenter or very handy with timber. Pick a basic project for your first one.
2. Use 19mm Thick Plywood or Timber.
Why 19mm? well, that's because it's used in most builds and therefore parts for the build will ideally match this and its about the right strength, thickness for cabs. Think about it,, you build it with 25mm timber and all of a sudden the screws from the handles don't go through all the way, the same for you screws on the back etc and now break your back lifting an extra few kilos. There are similar problems going thinner, its all fixable but why start with potential issues.
3. A Perfect Corner
You have to, I repeat have to have true corner angles. Think about how you are going to achieve this before building the box, this generally means using some kind of bracing on the insides and clamps (plenty of clamps) then only do one corner at a time for the best results
4. Glue or screw
There is no right or wrong way but generally, both are a good option however here are a few things to consider. A nice cabinet has routered edges and if you screw close to these edges then you are likely to hit the screws with your router and potentially wreck the router, bit or yourself. Try using dowel on the joints and only use screws when necessary but remember to watch when routing.
5. Selecting a glue for the cabinet
There are plenty on the market but I have to say nothing comes close to Titebond for me. I have tried most brands but Titebond is just something that works every time. It actually dries very fast and then leave it overnight to reduce any chance of ever getting the wood apart :)
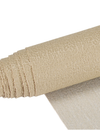
6. Cover your cabinet with Tolex
Tolex is a very strong covering that has a sensational look and protects your amp from bumps and scrapes. The second and most important benefit may be to hide your "not so great" joints (well until you improve) and while that's not the intended use it really can help hide some of your imperfections.
7. Start with Black Nubtex or Bronco Tolex
For your best chance of success, you should start with Black as a colour and either Nubtex or Bronco pattern as you will notice the joins less. These have the most forgiving patterns and you will need them for your first few builds.
8. Glue for Tolex
I use either Sika or Kwikgrip contact cement. Don't do it in the sun as you will give yourself less chance to work with it. Paint a neat thin covering similar to painting a wall and make sure you work on a large flat surface with plenty of ventilation. Paint the cabinet first and then the tolex, leave them to go sticky almost dried completely then join the two, get it right the first time as it's not coming off. FYI, I always precut my Tolex to the right size before starting and I join at the bottom of the cabinet but that's a whole other story
9. Use Corners
Corners are a great look, protect your amp cabinet but they also hide you bad corner joins when you first start learning to build cabinets. Trust me, its the cheapest $12 you will ever spend to help build a great looking cabinet
10. Leave the right gaps for the backboard and grill panel
Finally, number 10.. This is the worst mistake you can make because it's usually something that takes a lot to fix. Leave 3 to 4 mm all the way around on your backboard or grill panel as when you add tolex to your cabinet that will ad 1mm thickness then when you tolex the back panel or add grill cloth to the front wel thats another 1 to 1.5mm and you need room to move. trust me, 4 mm feel like too much until your finished
Well there is at least another ten I could share but for now that should help, good luck and enjoy the project
Leave a comment


- +61 457 205 573
- info@thespeakerfactory.com.au